Our journey with Google Education

Over the last term (Aug-Dec 2017) we’ve made some major changes to the devices and services we use across the school with children. In Jan 2017, I went to BETT and met with Ian Addison, who was kind enough to use the google stand and one of their chromebooks to give me a tour of his school’s set up on Google Suite for Education. I’d been wanting to get back to using google across the whole school for some time but finally the stars aligned and a chunk of capital, school expansion leading to the need to remove our ICT Suite and me being in the very fortunate position of being out of class meant it was possible.

Our ICT Suite was in need of updating but pressure on the space was at a premium and so we decided to free up the room by replacing it with mobile devices spread across the school. I was keen to provide a mixed environment for our children to work in, so chose a combination of ASUS chromebooks and Lynx Windows tablets (with removable keyboards). We set up Google Suite for Education (with lots of help from Google through their education tour last year as well as Ian’s invaluable blog posts) and began this academic year with 60 Chromebooks, 45 Lynx tablets and 2 new storage trolleys.

I’ve been very lucky to be able to deliver the roll out of the devices through teaching computing in our PPA sessions. We work on a two week rota, so each phase has a day out of class together every fortnight (brilliant for collaborative planning and working together as a team). The children have a programme of curriculum enrichment on those days comprising PSHE, dance, sport, computing, French and music. So I’ve had the amazing experience of teaching computing to roughly 360 children (years 1,2,5 and 6) every two weeks. Year 3 and 4 have been taught by my colleagues wormy my support. It’s worked brilliantly and the children’s skills have really developed and the insight I’ve gained into teaching computing has been amazing!

Some key points I’ve learned along the way (in no particular order!)

  • The ASUS chromebooks are a dream to work with. They are super fast, incredible battery life (they last 8.00 am – 3.15pm being used on 6 sessions of 50 min carousel with 180 children without recharging and usually have around 60% battery left!). They are amazingly consistent, behaving in the same way on every device, so I can practise on one and know what I show the children will be exactly the same when they do it.
  • Our Internet is more stable than I thought it would be. I chose to have some windows devices so that we could least have something on regardless of our broadband status. I needn’t have worried, after a few teething troubles whilst we had fibre installed, it’s never been a problem.
  • The windows tablets were cheap but they aren’t a patch on the chromebooks. Logging into google accounts on them can still take some year 6 children 10 minutes, whereas my entire year 1 cohort can turn on and log in in under 2 mins 30 s. This is due to a couple of factors – the chromebooks turn on in a few seconds, it can take the windows tablets 5-8 minutes just to turn on. The domain name is pre-completed on the chromebooks and the log in is the first screen the children see. On the windows tablets, children must open Chrome then go to classroom to log in. Despite numerous attempts by our technicians, some tablets still don’t open on our default homepage which has a short cut to classroom, adding further steps for the children to complete.
  • I picked up a tip on the google ed tour about asking children to close the lids on their devices when you want to talk to them. Sounds obvious but I’ve introduced it across the school and ‘lids down, eyes forward’ is something everyone knows. Once the children realise their work won’t be lost as Google autosaves everything and that the devices come back on instantly at the page they were working on they soon learn to concentrate on my modelling and we all get on much quicker!
  • The Google Education Group on G+ are fantastically helpful and have responded to my badly worded questions with patience, generosity and clarity. Along with hangouts with the wonderful Tim Bleazard and help on twitter, I am always grateful to have access to and the support of the online teaching community.

The next steps for us are now to embed the use of the devices across the school with our teachers taking up the challenge to use them in class.
#exabytes17 Micro:bits and the Iron Man in KS2

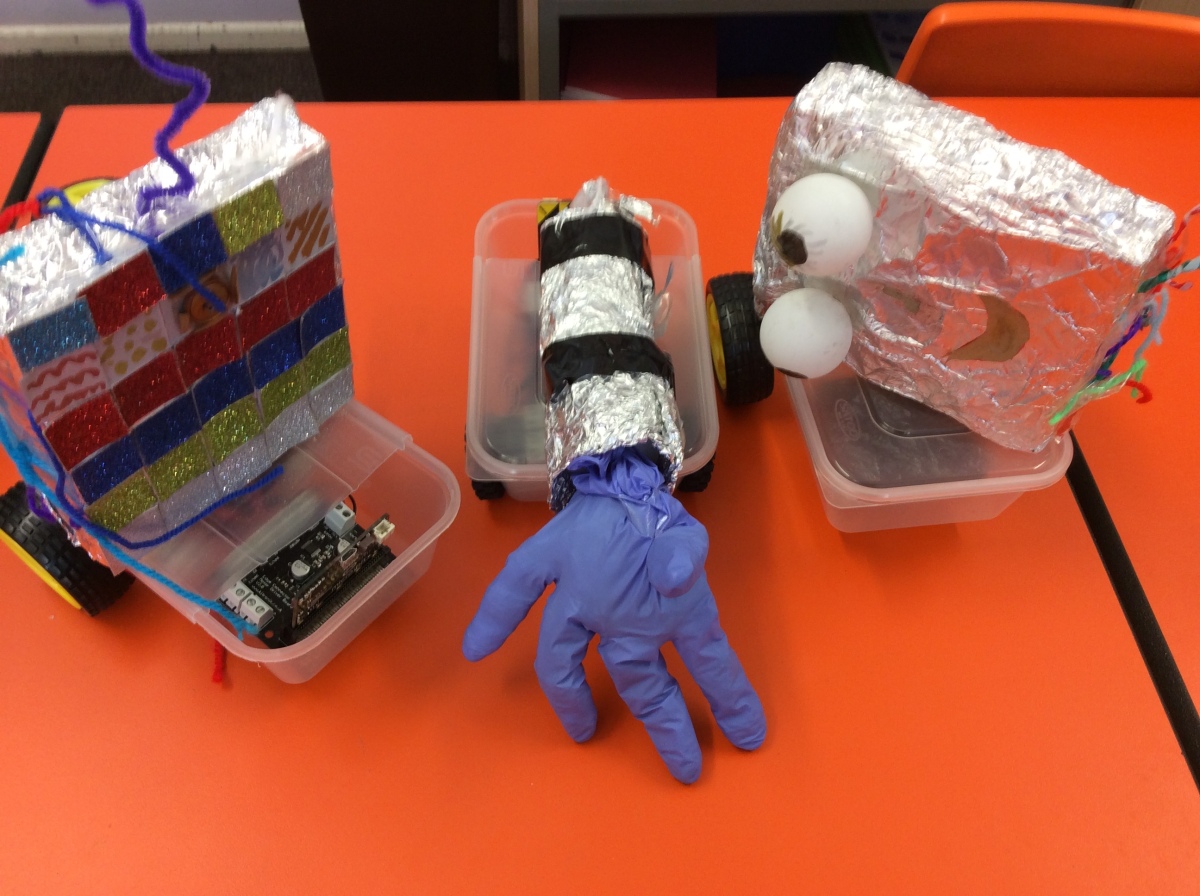
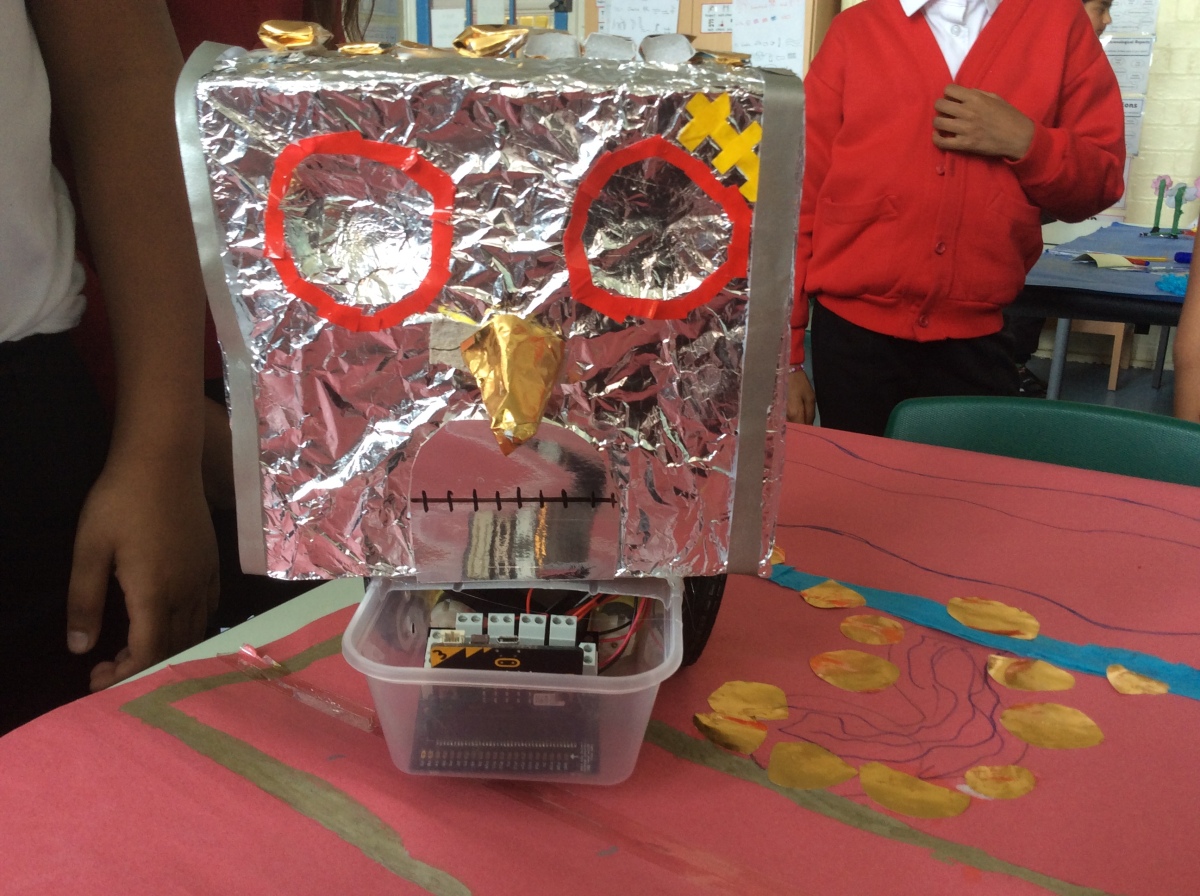
I had the pleasure of presenting at the #exabytes17 conference in Bradford on 7 July 2017. Yvonne Walker and I discussed our CAS Microbit project, making lunch box buggies on an Iron Man Theme! The resources for the project are on the CAS community site (sign up for free to download them all!).

We asked delegates to suggest their own ideas on how to use microbits across the curriculum and express interest in joining the project. Please use the google form if you are also interested!

CAS Annual conference: Using micro-bits across the primary curriculum

Making lunch box buggies with Iron Man body parts!

I was delighted to present the work from our CAS project Using micro-bits across the primary curriculum at the CAS Annual Conference on 17th June 2017. I presented with Yvonne Walker from CAS and demonstrated one of the buggies that we had made as well as letting delegates loose on some microbits.

We asked delegates to suggest their own ideas on how to use microbits across the curriculum and express interest in joining the project. Please use the google form if you are also interested!

Full details of the project and how to get involved:

CAS teacher resources http://community.computingatschool.org.uk/resources/4991

Iron Man Micro:bit buggies in action!

This week I have had the pleasure of working with three year 4 classes in our school to build our Iron Man Microbit buggies as part of our CAS project. Children have been learning about Ted Hughes’ Iron Man story in English lessons and so we started with discussing what the Iron Man would look like.

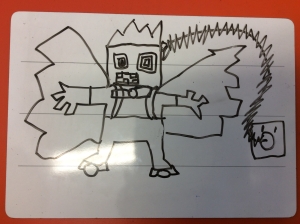
Children's drawing of the The Iron Man
The Iron Man
We then discussed the parts he was broken up into and children chose a body part to make which would later go on top of their buggy.  Children worked in groups to use junk to make their models.

Next they created maps for the different parts of the Iron Man to move across and meet in the middle to begin to reassemble him back  into an Iron Giant! Three groups worked together on each map, so that there were 3 body parts to get together. Some maps were 3-D with added ice-cream shops on the beach, boats in the sea and trees back on the hills behind the cliff, others were more simple and children focused on carefully measuring and mapping their route.

The children had two lessons introducing them to the microbits. First, we looked at the safety leaflet and linked this to the learning we had already done in Science on electricity. The children applied their science knowledge really well and could give good explanations of why water was not safe to have near the microbits. They were delighted when we then plugged them into a battery pack to play the start-up demo game that the microbits come shipped with (copies of the code are available so you can ‘reset’ the microbits if multiple classes are using them for the project).

In the second lesson, we talked and learned about input and outputs of various forms. We then used the ‘getting started tutorial’ on the JavaScript Blocks Editor (PXT) to work through coding different writing to be displayed when button A was pressed, and to generate a random number when the microbit was shaken. Some children took it further once they had discovered the ‘input’ blocks and had a response for every input!

We then spent a whole day focussing on building the buggies. We started by looking at the Barefoot computational thinking concepts and approaches to learning and sorted these according to whether the children understood the words or had not come across them. We learned what all the words meant and thought of examples together of how they might apply outside computing (they were all familiar with the analogy that algorithms are instructions like recipes), so for example, we can use Logic to predict what might happen in a story.  The terms were quite difficult for our children, especially as the large majority have English as an Additional Language. However, we kept referring to them throughout the day, prompting children to start using the language as they worked. They soon began to recognise when they were using logic to predict which part of their buggy might be broken.

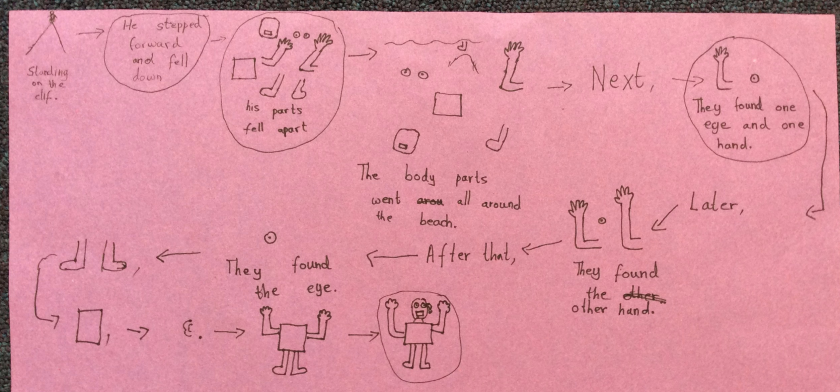
We started by drawing a text map of the first chapter of the Iron Man and then showing how this was an algorithm to tell the story in a sequence and that we had decomposed the story into parts. I then challenged the children to abstract the key parts of the story, choosing just four steps to retell the most essential plot points. This helped them to understand how abstraction was the process of removing unnecessary detail.

story map
Story map showing abstraction by choosing 4 key elements of the plot to retell the story in the fewest of steps.
Next we built the buggies. Children worked in groups of 3 and we followed the instructions together as a class, helping each other to solve problems along the way. Clear photographic instructions helped, as did using a visualiser to show how some of the more fiddly parts were done (e.g. attaching wires to the motorboard).

The children were given a microbit with the code for making the buggy move forward by about 30 cm when buttons A+B were pressed. This helped to identify any faulting wiring, problems with batteries before moving on to more complex coding.

We then allowed the children to tinker with this code to create the code for a left turn when button A was pressed, and a right turn when button B was pressed. Children quickly understood how to make the buggies move a shorter or longer distance by altering the code for moving forward, however, tinkering to create the turns was much more challenging and took some modelling and support from the me and the class teacher.

Finally, we glued the Iron Many body parts to the lunchbox lids (which had been cut down so that the children could reach the buttons on the microbits!) and set them off on the maps to meet up in the middle. All the children were successful in getting their Iron Man body part to move, some made them turn and others had a combination of turns and moving forwards to reach the centre.

The atmosphere in the classroom all day was amazing, the children were buzzing and engaged and despite many difficulties (with motors, wiring, wheels sticking on the lunch box lids, batteries inserted the wrong way round, coding errors to name a few!) they persevered and work together to have some success.


Using a second Microbit as a remote control for the lunch box buggy

A second Microbit to use as a radio control for the buggy.

On Friday, a very large box of Microbits arrived from Kitronik (via BCS who are distributing the Microbits for our CAS project). So I finally had a second Microbit to try out.

First boot

The first Microbit I had was a gift from Yvonne Walker at CAS, so I hadn’t one fresh out of the packet before. I was delighted to discover that once the supplied power pack was attached, the Microbit booted and ran an introductory code. The microbit ‘introduces’ itself and walks you through using the buttons and accelerometer (see Intro to the Microbit from Tech will save us). I will be able to use this for our first lesson using the Microbit, once we have also looked at the safety leaflet and thought about how to handle them safely. (You can re-instate the start-up code from the copy on Tech will save us).

Programming the remote control


Tech will save us has a nice tutorial and code to make a remote control for their buggy. I adapted this code as I had used a different command to control the motors. The remote control Microbit now uses the accelerometer to move the buggy forwards and backwards, pressing button A makes the buggy turn clockwise and button B makes it turn anticlockwise, pressing A+B stops the buggy. The code could do with  some refinements as at the moment, it is a two man job to turn the buggy off! Holding down A+B continuously stops the buggy still, whilst someone else switches the power pack off. I’ve also lost the granularity of control I had before, so that going forwards and back for a set time, and turning clockwise and anticlockwise for a set time to effectively turn 90 degrees has been lost within the forever loop.  So, any suggestions on how I can get that control back and/or how I can make A+B stop the buggy by one press would be really helpful! The code I have so far is shared below (for the PXT block editor).

Microbit lunch box buggy coding

IMG_4973
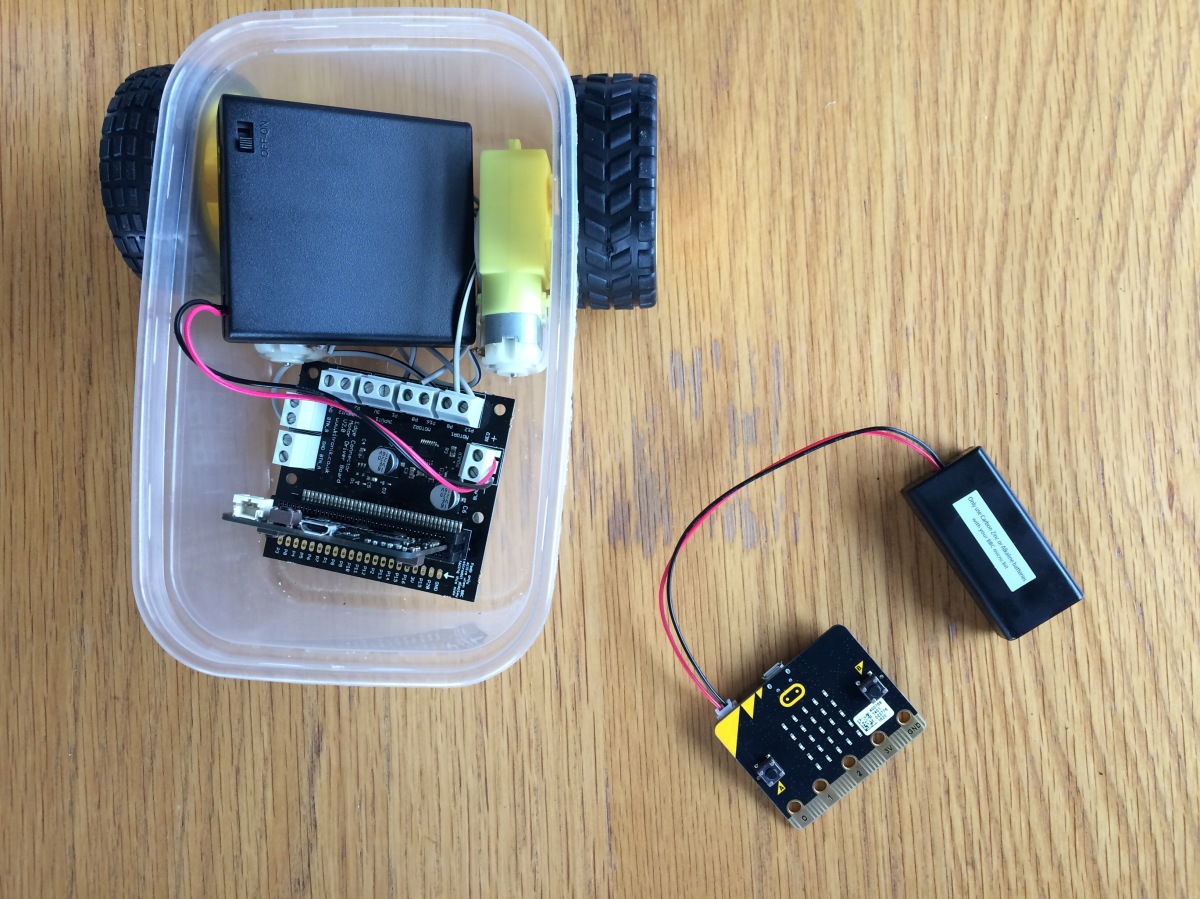
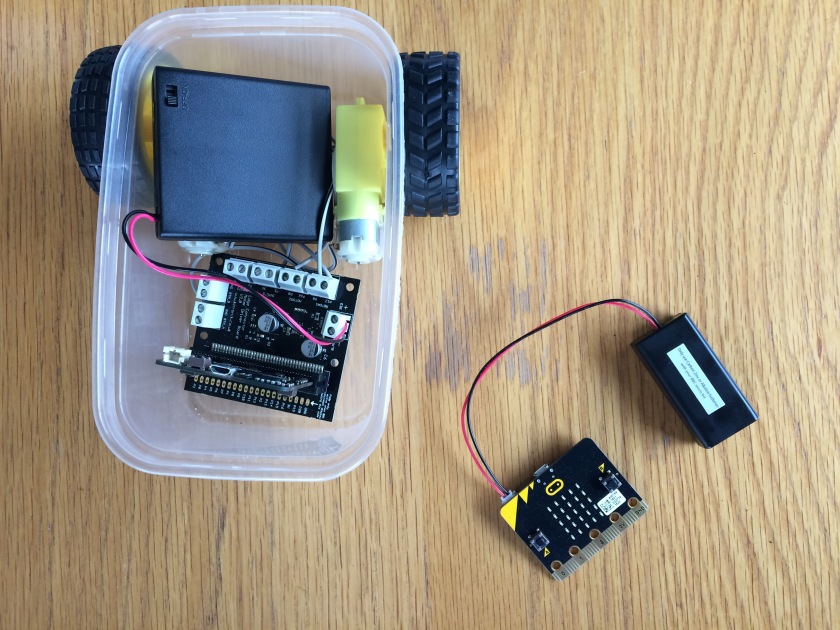
lunch box buggy

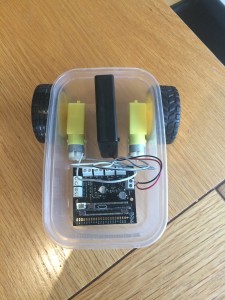
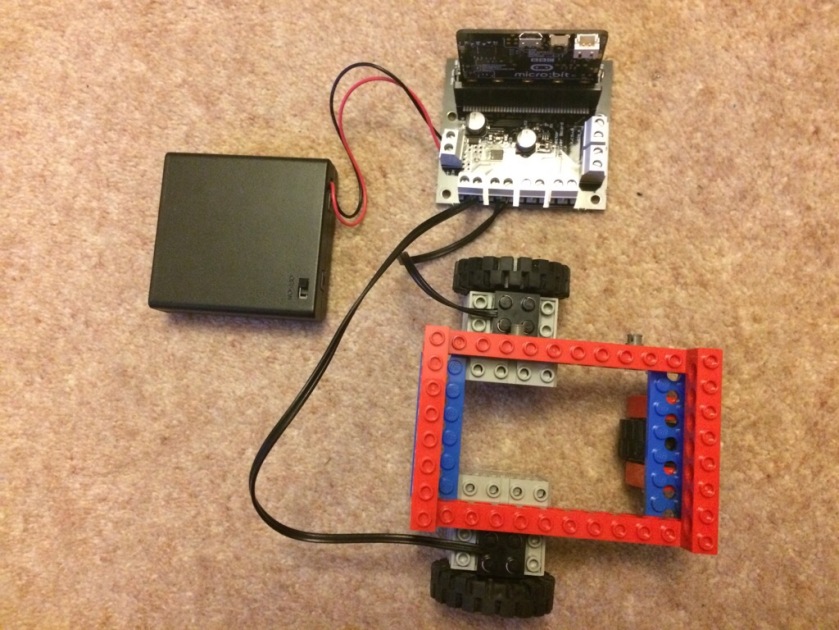
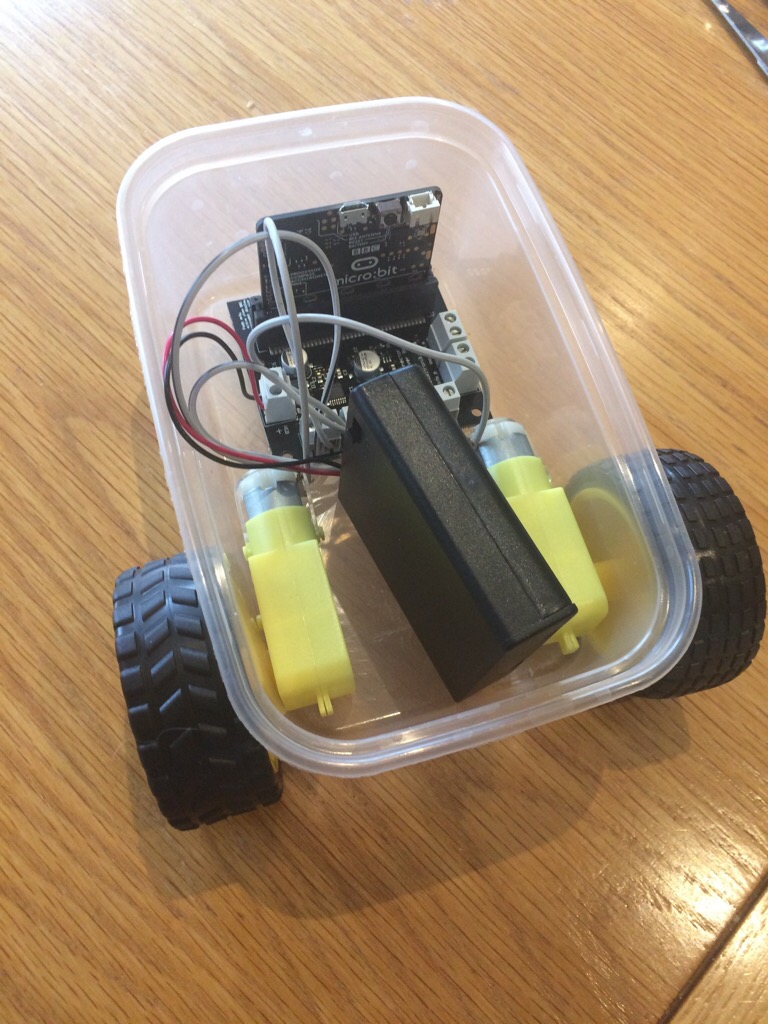
We are building lunch box buggies controlled by Microbits as part of a CAS project. So far, I’ve built two versions of the buggy (one in Lego and one using Kitronik kit) and quickly written some very simple code to make it move forward.

I wanted to have some basic sections of code that our children could tinker with and then put together in a sequence to navigate the buggy around a given course.

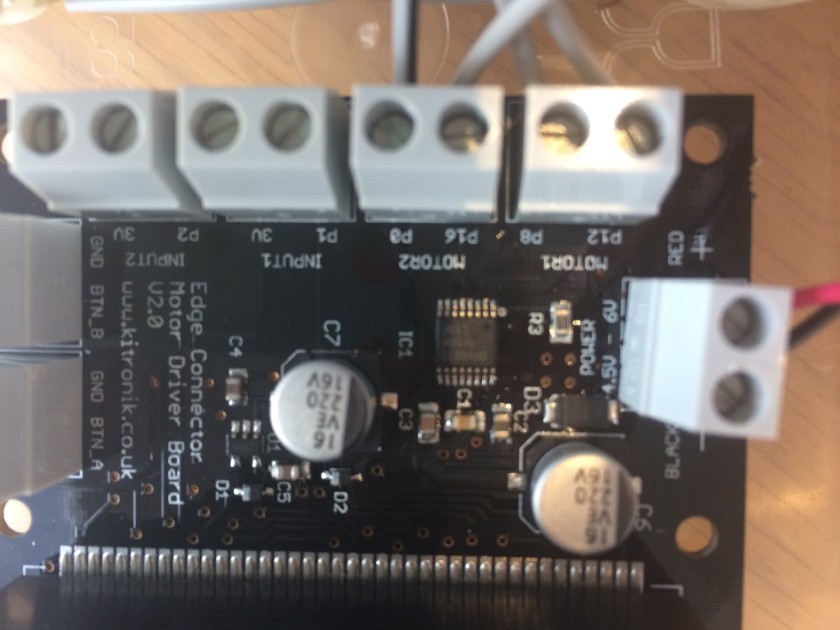
As I understand it, the motor board has four pins that between them can control 2 motors. There are two wires from one motor to the motor board that connect to two pins (i.e.: motor 1 uses PIN12 and PIN8 and motor 2 uses PIN16 and PIN0).

IMG_4975
motor boards and pins
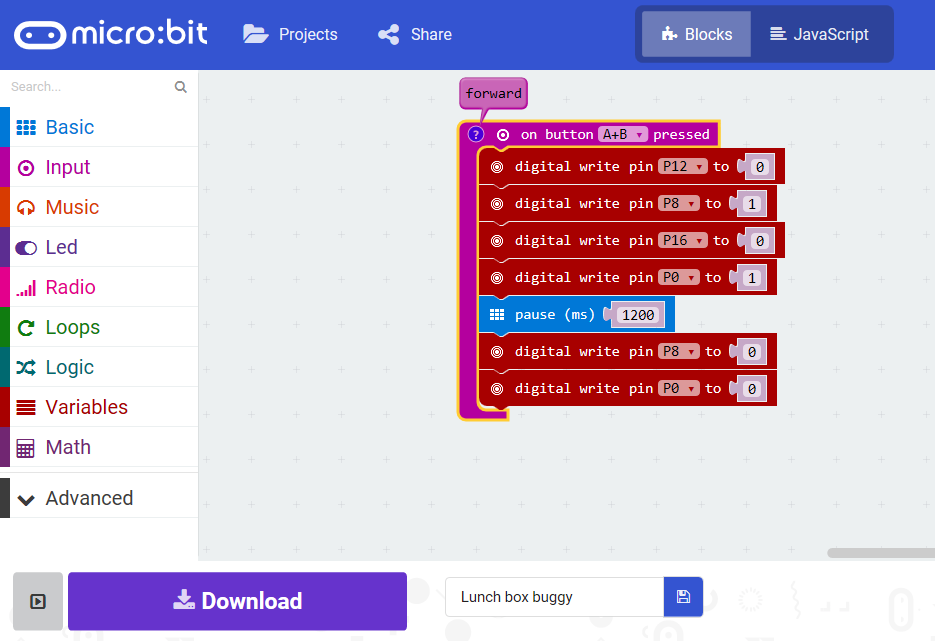
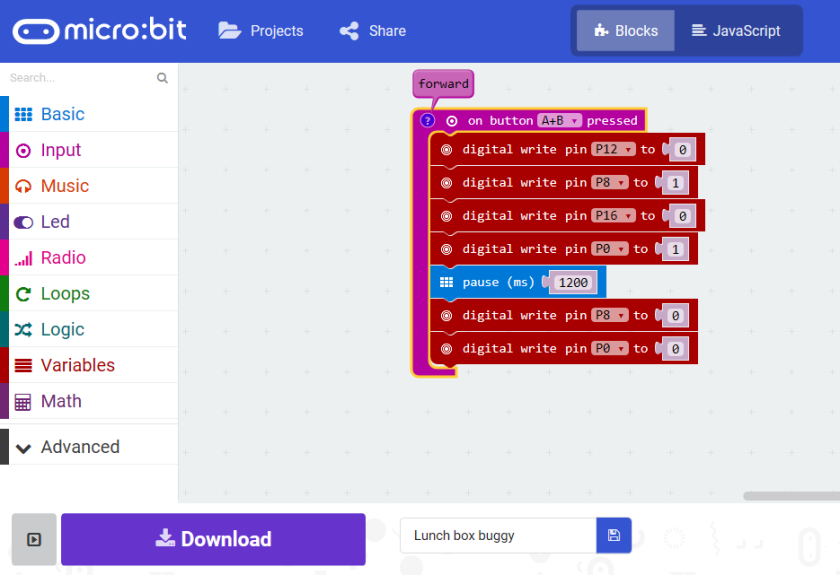
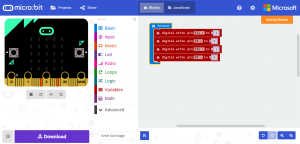
Using the command ‘digital write pin12 to 1’ turns the electricity on to pin12 (on motor 1) and ‘digital write pin12 to 0’ turns the electricity off to pin12. So going forward when both button A+B are pressed looks like this:

forward

After some tinkering and with lots of help from my beloved Husband (who knows his way round Linux and other command line code) and the lovely Lorraine Underwood, we found we could add a comment to label this section of code as ‘forward’ (go to the JavaScript and add a line at the top with ‘// forward’, then back into blocks and the little blue question mark at the top left appears with a comment. We then worked out that by having one motor run forwards the other run backwards, we could turn the buggy in a circle. The tricky part was working how to make it stop, however, once we worked out that once a pin was turned on, it didn’t turn off until set back to 0, we realised that adding a pause then setting the pin back to 0 would run the motor for a set amount of time. After that it was a case of trying different amounts of time to get a quarter turn. Eventually we discovered 1200 ms was about the right amount of time!

I’ve tried the buggy on a few different surfaces at home as the wheels seem to slip sometimes, and the shape of the lunchbox, with slightly sloping sides causes the wheels to be a slight angle. All of this can make the turns slightly more or less than the 90 degree turn I want, but this is something we can debug with code and with the mechanical aspects with the children once we have the final buggies made.

The code I’ve written so far is published online in the PXT editor. Button A turns right (clockwise), Button B turns left (anticlockwise) and A+B makes the buggy go forward.


Reviving our Lego Mindstorms with Microbits

Using Microbit with Lego Mindstorms technic Lego in primary computing.

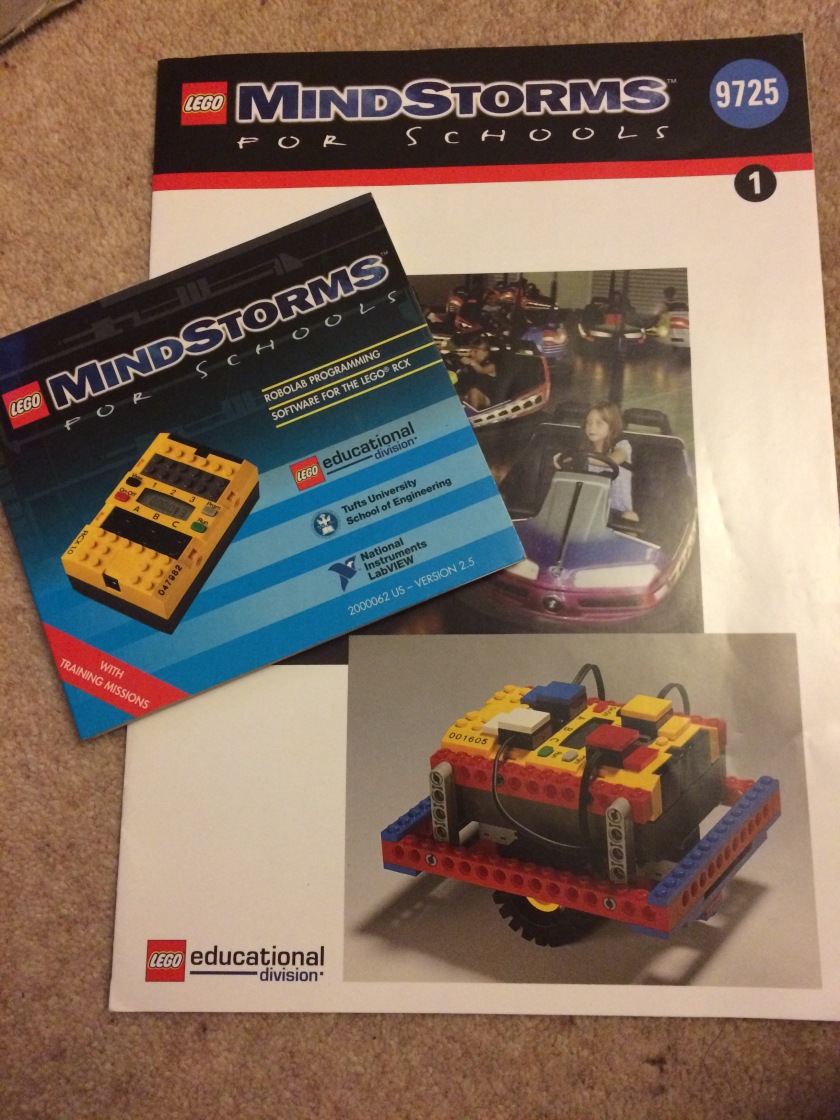
Like many schools we have equipment that was bought, well used by a couple of teachers and then they left, the focus on the curriculum changed and the equipment began to languish unloved and gather dust in a corner. We have several sets of Amusement Park Lego Mindstorms For schools (RCX1.0 controller, set number 9725) that haven’t been out of the box in at least the last three years (though the dust on the top of the boxes suggested and the fact that the sets were first released in 1998 leads me to suspect it may have been much longer!). 


Whilst the Robolab software and the drivers can be made to work with Windows 10 (the original requirements were for Windows 95 – bless), I felt it was time to try something different. 

As part of a CAS cross-curricular project to use Microbits with our year 4 children, we are building lunchbox buggies. We have some kit to build buggies but in an effort to give as many children as possible a hands-on experience, whilst not spending any money, I turned to our old Lego kits. 

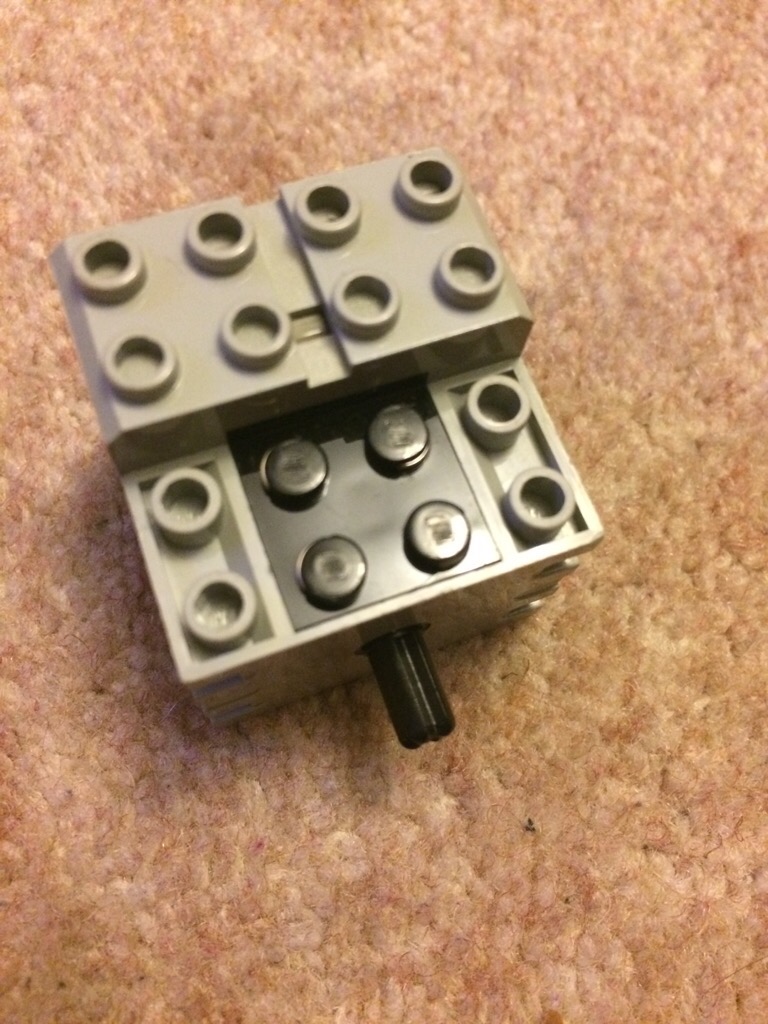
The Lego motors are more powerful than the hobby motors we used from our buggy kit, but I kept the power pack (4×1.5V AA batteries) and the motorboard the same and hoped for the best! 


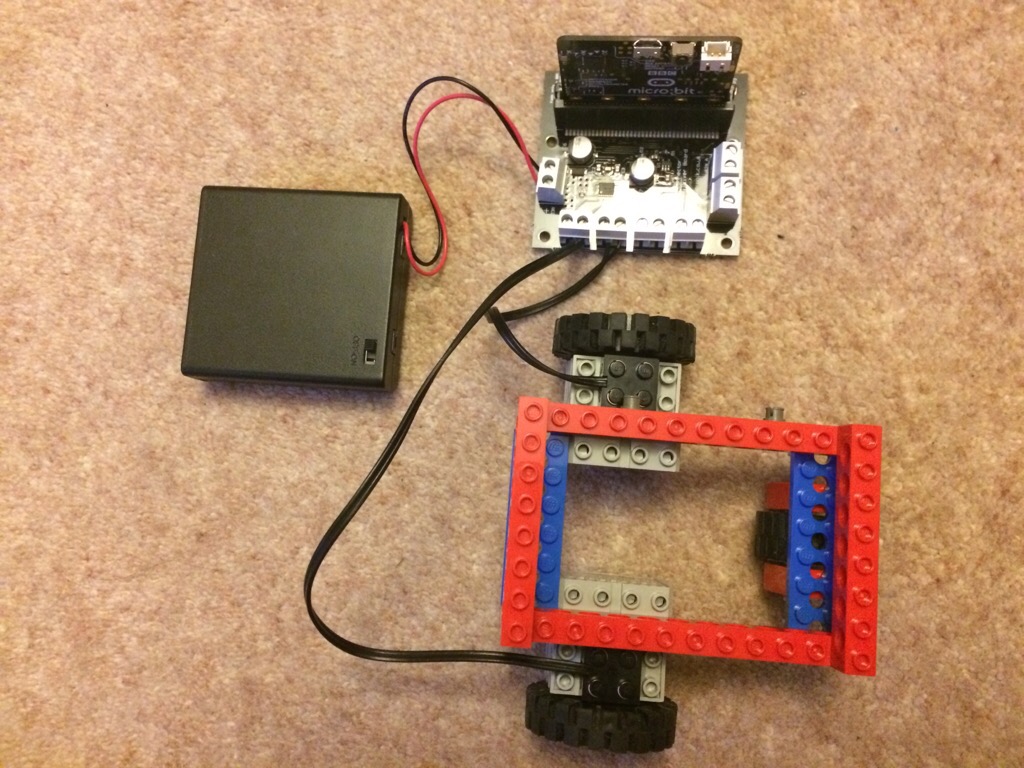
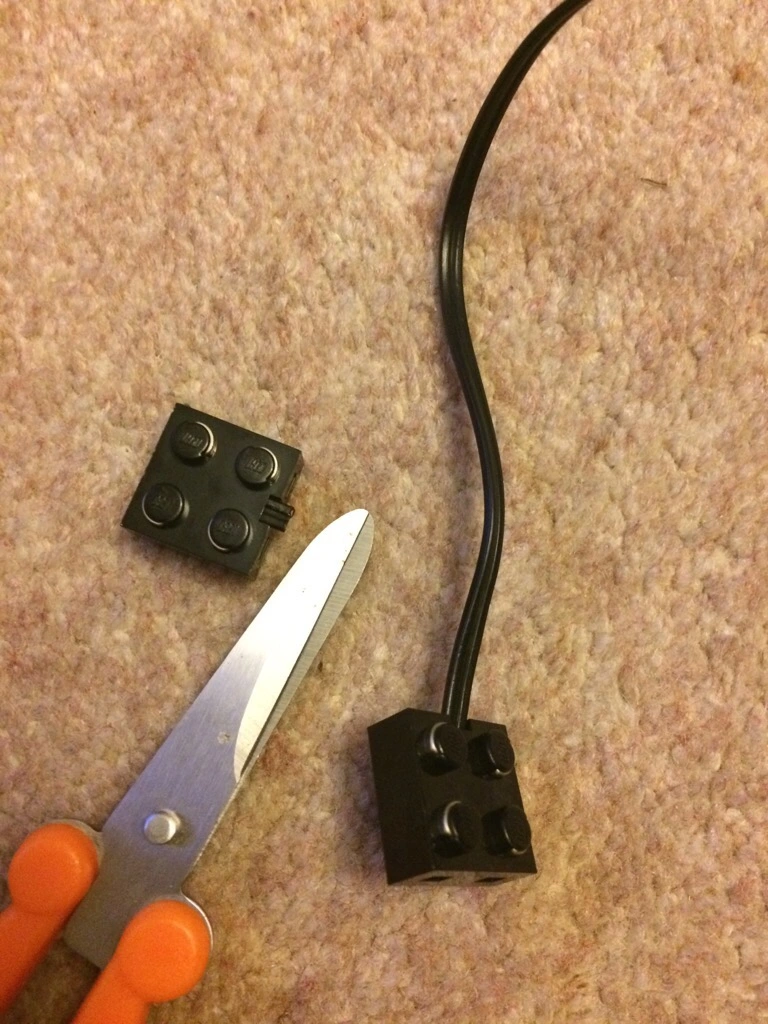
I cut off one end of the Lego wire connectors, split and stripped back the wires and connected them to the motorboard. 


I built a very simple frame and balanced the board, Microbit and power pack on top and switched it on and to my delight it worked!


So we will be sacrificing a set of Lego connectors but gaining a new set of resources at no cost to make more buggies. This will also allow us to offer two different ways of building buggies. Whilst the Lego one is perhaps more familiar, building the frame will be more of a challenge than using the lunch box and there is more physical dexterity and care needed to attach the wires to the motors when not using the Lego connectors. 

So if you have some old technical Lego gathering dust dig it out and give it a go!

Micro:bit lunch box buggy

My first attempt at building a simple buggy controlled by a microbit.

Next term at Rushey Mead Primary, we are trialing the Primary CAS Hub Micro Bit Project.

Aim of the project

The DfE has identified a number of ‘opportunity areas’ DfE announcement areas where there is an opportunity to create more computing support for teachers in deprived areas. This project aims to create a programme of support for primary schools in those areas (or in other areas that are classed as being deprived) focusing on a cross-curricular scheme of work which embeds the development of pupil’s computational thinking skills and which uses the micro bit with the aim of enhancing learning and motivation in KS2 pupils.

The project aims to enable a CAS Hub to provide the teachers in the project schools with the resources, skills and knowledge to confidently teach their pupils using the scheme of work and to provide ongoing support in terms of evaluating the effectiveness of the teaching and learning and to produce a case study that exemplifies the impact of project. Hubs that are able to find 2 or 3 schools that are in deprived areas and who are willing to get involved in running this project will be entitled to a free class set of micro bits, as will their project schools. These Micro Bits have been kindly sponsored by the Micro Bit

The resource pack on the CAS teacher resources site (free sign up required) includes a cross-curricular SOW based on the Ted Hughes Iron Man novel and involves the pupils building their own Iron Man model (D&T) and a micro bit controlled buggy (CS) and using their creation to retell an aspect of the Iron Man story (IT).

Building the buggy

img_3523-1
Nic Hughes’ Crumble controlled lunch-box buggy
The heart of the project is to make some simple buggy robots controlled by a microbit. Inspired by Nic Hughes’  Crumble buggy that I built in his CAS Annual conference workshop in 2016, (full instructions on his workshop slides) shown on the right, I thought we could make something similar using a microbit to control the buggy.
Kitronik have very kindly got the project started by sending us enough kit to make 7 buggies and we will have microbits provided by the Microbit foundation. So it was my job in the holidays to check that this would actually work!


Building the buggy was straight forward, though I made a list of helpful tips to remind me of things I will need to sort when scaling this up at school with our children:

  1. We need a supply of wire to connect motors to motor board and a system to either pre-strip the wires for the children, or a handy teaching assistant dedicated to the job in class! Attaching the wires to the motors is fiddly and it may be easier to solder them on.
  2. When we punched holes in the lunch box, the instructions recommended using an electric drill, we thought a bradawl might work but it split the plastic, so resorted to hot wire instead. Again, this will need to be done ahead of time or supervised in the classroom.
  3. It took my husband quite a while to find an appropriate slot head screw driver with parallel sides and very narrow head (3 mm) that would fit the very small screws in the connectors that hold the wires from the motor and batter packs in place on the motor board. We will need a good supply of these in the classroom!
  4. Double-sided tape to stick the ball caster to the underside of the buggy worked really well.
  5. The lunch box itself needs to be big enough for the wheels to clear the rim of the box – ours *just* made it!

Coding the microbit

The next step was getting the motors working. With some help from the wonderful Lorraine Underwood who managed via twitter to point me in the right direction whilst marooned in her car with a sleeping toddler, I succeeded in getting both motors working so the buggy can move forward.

What had perplexed me initially was that the microbit looks to have 4 main pins (the large gold ‘holes’), however, there are in fact 16 pins that can be addressed and when the microbit is popped into the motor driver board it all looks a bit more complicated! Looking closely at the motor driver board, you can see that pins P12 and P8 control Motor 1 and P6 and P0 control Motor 2. I also needed to know the right block to use – under the ‘device’ or ‘pins’ blocks – ‘digital write (0,1)’.

This slideshow requires JavaScript.

Finally, on Lorraine’s recommendation (and to see if I could transfer what I’d learnt in one coding environment to another one), I wrote the code again in the JavaScript blocks  PXT editor.  My very simple code (shown right)

lunchbox code forward simple
link to the code
to make the buggy move forward simply gives power to the motors when the batter pack is turned on.


The next steps will be to make the buggy turn left or right and to add some degree of control over it, perhaps by using the buttons.


Improving our well-being using a staff shout board 

As teachers, we look out for the morale and well-being of the children in our care everyday. However, there is a growing awareness that we neglect to look after our own well-being as teachers.

We started the year well, but pressures mount quickly, and by the time half term was approaching, we were concerned about morale within school. So, as an SLT, we took several steps to try to boost our morale and show our staff how much we value them. We had a niggle box in the staff room for a month (October became Moan-tober).  At the end of October, we addressed the niggle box concerns and put some new ideas in place.  We started to provide free tea, coffee, sugar and milk for everyone and we provided pizza or vegetarian curry (school is just at the end of the fabulous Golden Mile!) at all our twilight meetings. We started to look again at our marking policy, as this was an area of concern from a work load and expectations point of view.

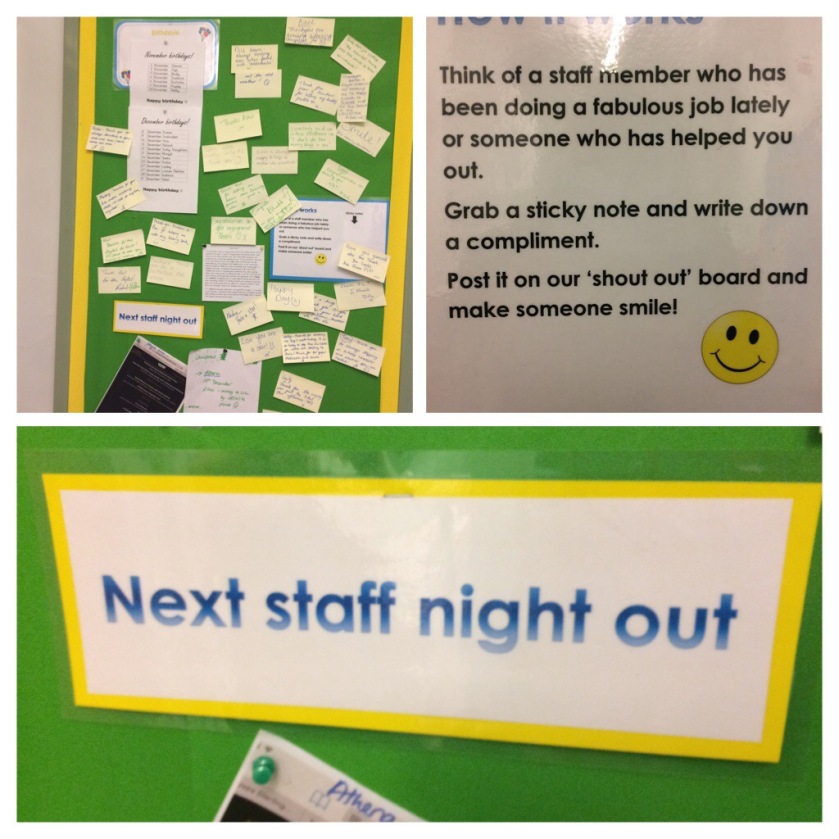
We also started a Staff Shout Out board. From an idea I saw on Twitter, we transformed a large notice board that is in between our staff toilets and the staff room and isn’t seen by children (except for a few brave Eco Warriors that come to empty the staff room recycling bin!). it has several sections:

  1. We have a list of birthdays each month that includes everyone – cleaners, lunchtime supervisors, TAs, teachers and admin staff.
  2. Staff nights out, or other social activities (for example, someone has just suggested we start a book club).
  3. Funny things overheard in the playground.
  4. The main area is given over to post-it notes (a ready supply with pens is kept in a box on the board) that people can use to send a shout out to someone else.

So far, it has been very well used! I’ve had to clear post-it notes off the board every month otherwise it would be so stuffed full no-one would be able to see anything. Messages range from saying thank you for holding a door open when someone had their arms full, congratulating staff that have got engaged, count downs to the holidays and thanking people for their support when staff have returned from long term sick leave. It makes people smile as they go up to the staff room and I make sure that everyone gets to keep the post-its about them when I take them down.

fc0a1357-a7a3-47a1-aac6-0eedb04504e5-collage

It is the little acts of kindness that remind us what a tough job we do and that we all deserve a break now and then! My next challenge is to keep it going with the enthusiasm that we begun. I’ve noticed the frequency of post-its has slowed over the last half term, so if you have any ideas about how it can become more sustainable, let me know!

Leicester University NQT Conference – Challenging the most able

Presentation at Leicester University NQT Conference, January 2017

Presentation at Leicester University NQT conference on 18 January 2017. I was asked to speak about challenging more able pupils, but of course, bent the topic around to using ICT to challenge children.